Advertisement – Recommended Aviation Gear

- FIVE STAR COMFORT: Embark for every journey sporting maximum comfort. Our over the ear headphones are constructed for a …
- FIVE BY FIVE COMMS: We understand reliable communication is key for safety. Our noise canceling headset with a microphon…
- EXCEPTIONAL QUALITY: Invest in your future. Aviation headsets for pilots are essential aviation tools that should be bui…
Affiliate disclosure: AviatorFinds participates in affiliate programs, including Amazon Associates. Some links on this page are affiliate links, which means we may earn a commission from qualifying purchases at no additional cost to you. As an Amazon Associate I earn from qualifying purchases.
Runway markings, signs and lights are the visual language of every airport. The white paint tells you where to line up, where to aim and where landing is allowed. The signs tell you where you are and where you must stop. The lights carry that same information into the night and into poor visibility. This guide brings all three together in one place, explains what each cue means, and shows how student pilots actually use them during takeoff, landing and taxi.
This guide follows the US FAA Aeronautical Information Manual (AIM). Most markings are similar worldwide under ICAO standards, but details such as distances and some colors vary by country. UK pilots should cross-check with the CAA’s Visual Aids Handbook (CAP 637), linked at the end. Always follow your instructor and the current official publications.
Part 1: Runway markings
Runway numbers (designators)
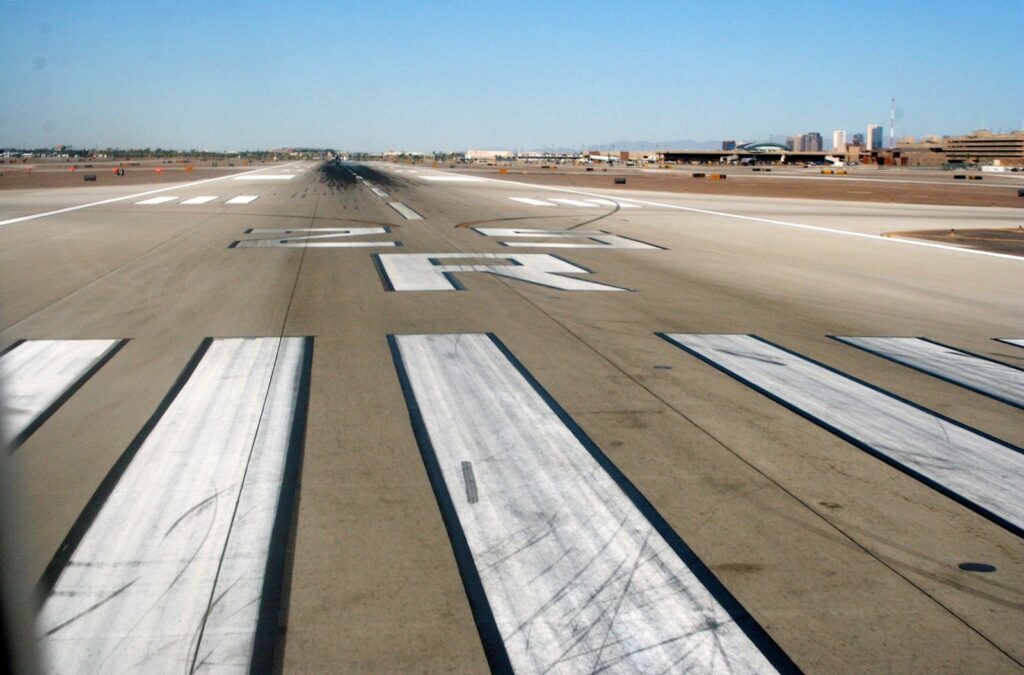
Runway numbers come from the runway’s magnetic direction as seen from the approach end, rounded to the nearest 10 degrees and dropping the last digit. A runway aligned with about 184 degrees magnetic is marked “18”; the same strip used in the opposite direction, about 004 degrees, is “36.” At airports with parallel runways, a letter is added: L, C or R for left, center and right.
On lineup, the number painted in front of you is your final visual check that you are on the runway you were cleared for. If it doesn’t match your expectation or your heading indicator, stop and verify before you add power.
Centerline
The centerline is a line of evenly spaced white stripes and gaps down the middle of the runway. It provides alignment guidance for takeoff and landing and is your primary reference for directional control, especially in a crosswind.
Threshold markings (“piano keys”)
Threshold markings are longitudinal white stripes across the start of the runway that is available for landing. On many runways, the number of stripes indicates the runway’s width.
Displaced thresholds
Sometimes the landing threshold sits further down the runway than the physical start of the pavement, often because of obstacles on the approach. White arrows lead up to a white threshold bar marking the displaced threshold. The pavement before it may be used for taxiing, for the takeoff roll in either direction, and for the landing rollout from the opposite direction. You must not touch down before a displaced threshold.
Aiming point markings
The aiming point is a pair of broad white rectangular stripes, one each side of the centerline. Under the FAA standard, they sit approximately 1,000 feet from the landing threshold. On approach they are your visual aiming point. They are not necessarily where the wheels touch: in most light training aircraft, the flare means touchdown happens a little beyond them.
Touchdown zone markings
On runways that have them, touchdown zone markings are groups of one, two and three rectangular bars arranged in pairs either side of the centerline. Under the FAA standard, they are coded to give distance information in 500-foot increments, helping you judge how far down the runway you are.
Side stripes
Continuous white side stripes mark the edges of the runway and give contrast against the surrounding terrain or shoulders. They are particularly helpful on wide runways and in poor visibility.
Chevrons and closed runways
Yellow chevrons mark pavement aligned with the runway, such as a blast pad, that is unusable for landing, takeoff and taxiing. Never use pavement marked with chevrons. A runway marked with large crosses (an “X”) is closed. In the US, these crosses are yellow; in some other countries they are white. Never use a closed runway, even if it looks clear.
Part 2: Runway and taxiway signs
Signs confirm what the paint is telling you and are critical during taxi, when most runway incursions begin. Color is your first clue:
| Sign type | What it looks like | What it means |
|---|---|---|
| Mandatory instruction (runway holding position) | Red background, white inscription | Entrance to a runway or critical area. Do not cross without a clearance. |
| Runway location | Black background, yellow inscription and border | Identifies the runway you are currently on. |
| Taxiway direction | Yellow background, black inscription with arrows | Shows the taxiways ahead and which way to turn to reach them. |
| Taxiway location | Black background, yellow inscription and border | Identifies the taxiway you are currently on. |
| Runway distance remaining | Black background, white numerals | Runway length remaining, in thousands of feet. |
A red sign means stop and think. Runway holding position signs are paired with yellow holding position markings on the pavement: four yellow lines, two solid and two dashed. Hold on the solid-line side until you are cleared onto or across the runway. If you’re not sure of a clearance, ask. A short call to the tower or ground controller is always better than an incursion.
Part 3: Runway and taxiway lighting
- Runway edge lights outline the edges of the runway at night and in reduced visibility. They are white, but on instrument runways yellow replaces white on the last 2,000 feet or half the runway length, whichever is less, as a caution zone.
- Threshold and runway end lights are directional. They show green toward an aircraft approaching to land, marking the threshold, and red toward an aircraft on the runway, marking the end of the runway.
- Runway end identifier lights (REIL), where installed, are a pair of synchronized flashing lights either side of the threshold. They help you pick out the runway end from the surrounding lights.
- Runway centerline lights are installed on some larger runways to help with alignment in low visibility. You don’t need to master them early, but you should recognize them.
- Taxiway lights: taxiway edge lights are blue, and taxiway centerline lights, where installed, are green.
Part 4: Using runway cues during takeoff and landing
Lineup and takeoff
- Line up with the centerline running straight beneath you, with the nosewheel and mains aligned. A small offset at the start becomes obvious as speed builds.
- Check the runway number and your heading indicator agree.
- During the takeoff roll, look well down the runway and use rudder to keep the centerline steady. Side stripes give a useful peripheral cue on wide runways.
Final approach
Make the aiming point your visual anchor. On a stabilized approach, it stays fixed in the same place in the windshield. If it starts moving up the windshield, you are getting low; if it moves down, you are getting high. Adjust pitch and power to keep the picture steady, and remember any displaced threshold: you are aiming to cross the threshold safely and touch down beyond it, not on it.
Flare, touchdown and rollout
As you transition to the flare, shift your gaze down the runway, keep the nose aligned with the centerline and let the aircraft settle. Touchdown zone markings help you judge whether you are floating: landing well beyond them is usually a sign of excess speed or a late flare. After touchdown, keep flying the aircraft. Keep your eyes far ahead, use smooth rudder to track the centerline, and watch the side stripes for slow drift as the aircraft decelerates.
At night
Edge lights form a corridor that confirms alignment, and threshold lights help confirm you have the correct runway. Cross-check what you see against the airport diagram and your clearance.
Quick reference: runway cues at a glance
| Cue | What it looks like | What it tells you |
|---|---|---|
| Runway numbers | Large white two-digit numbers, sometimes with L/C/R | Magnetic direction of the runway and which parallel runway it is |
| Centerline | Evenly spaced white stripes down the middle | Where to align for takeoff and landing |
| Threshold markings | White longitudinal stripes across the runway start | Beginning of the runway available for landing |
| Displaced threshold | White arrows leading to a white threshold bar | Do not land before the bar |
| Aiming point | Two broad white stripes, about 1,000 ft in (FAA) | Visual aiming point on approach |
| Touchdown zone | Pairs of white bars in groups of 3, 2 and 1 | Distance from the threshold |
| Chevrons | Yellow chevrons | Unusable pavement: no landing, takeoff or taxi |
| Edge lights | White, turning yellow near the end on instrument runways | Runway edges at night or in low visibility |
| Threshold and end lights | Green toward arriving aircraft, red toward the runway | Start and end of the usable runway |
| Mandatory sign | Red background, white inscription | Clearance required to enter or cross |
Common student pilot mistakes
- Aiming at the runway numbers or threshold instead of the aiming point.
- Confusing a displaced threshold with a normal one and landing short of it.
- Drifting off the centerline during the takeoff roll or rollout from lazy rudder or looking too close to the nose.
- Landing long because the runway “looks huge.”
- Mixing up runway location signs with taxiway signs, or entering a runway without positive identification.
- Relying on a moving-map app instead of looking outside during taxi.
Practice tips that build confidence
Chair-fly every takeoff and landing before you fly, talking through what each marking, sign and light means on the airport diagram. In the aircraft, call out what you see — runway number, centerline, threshold, aiming point — and acknowledge signs out loud during taxi. Instructors and examiners aren’t looking for memorization; they want to see you use these cues deliberately: a careful lineup, a stable approach picture, a consistent touchdown point and a controlled rollout.
Study aids that help
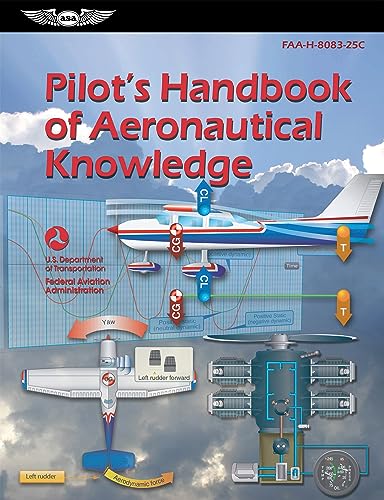
A good reference book and a kneeboard make it easier to learn the airport environment and keep notes during lessons. The FAA’s Pilot’s Handbook of Aeronautical Knowledge (free to download from the FAA, also sold in print) covers airport operations, and UK students often use the Pooleys Air Pilot’s Manual series, where Volume 2 includes a chapter on aerodromes.

- Brushed Aluminum Construction: Provides a strong, durable writing surface.
- VFR Quick-Reference Placard: Includes essential flight information for fast access.
- Adjustable Elastic Leg Strap: Ensures a secure and comfortable fit without binding.
UK students can find the Air Pilot’s Manual series through Pooleys and other UK pilot shops.
For a free visual study aid, download the FAA’s Pilot’s Guide to Airport Signs and Markings and keep a copy in your flight bag.
Frequently asked questions
What do the numbers on a runway mean?
They are the runway’s magnetic direction rounded to the nearest 10 degrees, with the last zero dropped. A runway pointing 183 degrees magnetic is Runway 18, and the opposite end is Runway 36. Parallel runways add L, C or R for left, center and right.
What are the white stripes at the start of a runway called?
They are threshold markings, often called “piano keys.” They show where the usable runway for landing begins, and on many runways the number of stripes also tells you how wide the runway is.
What does a runway hold short line look like?
Four yellow lines across the taxiway: two solid and two dashed. Hold on the solid-line side, and do not cross without a clearance at a towered airport. When you exit a runway, you are clear only once the whole aircraft has crossed both sets of lines.
What color are runway edge lights?
Runway edge lights are white. On instrument runways, yellow replaces white on the last 2,000 feet (or the last half of the runway, if that is shorter) to warn of the approaching runway end.
Ready to put this into practice?
The best way to learn runway markings is to fly with a good instructor. Find a school or club near you, or explore airfields in the AviatorFinds directory.
Run a flight school, club or airfield? Add or claim your free AviatorFinds listing, or see Premium listing options.
Further reading
- Learning to Fly in a Cessna 172: A Beginner Pilot’s Journey
- Aircraft Radios Explained: How Pilots Talk to Air Traffic Control
- The Best Aviation Headsets Under $500
- Aviation Gifts for Pilots by Budget