Introduction
Runway markings aren’t just painted instructions — they’re active visual cues that help student pilots judge alignment, aim points, and landing accuracy in real time. Once you’re airborne or rolling at speed, these markings become part of how you fly, not just something you memorise for exams.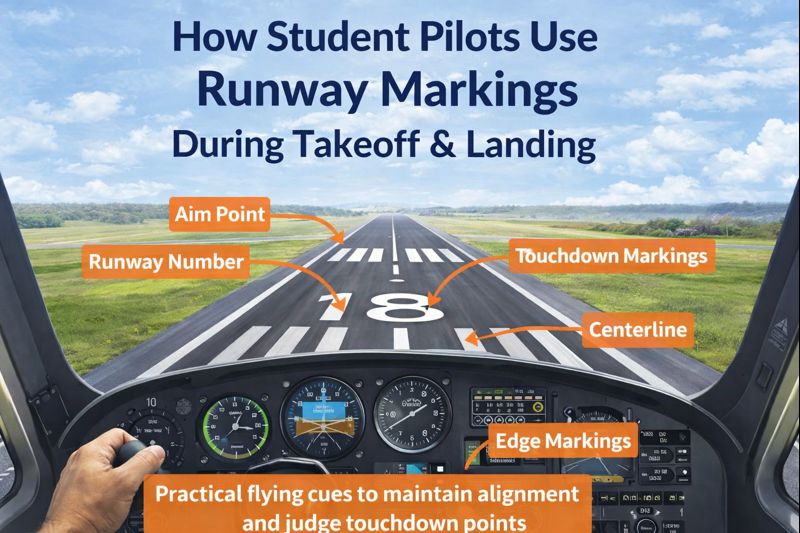
If you’re still learning what each marking means, start with our complete visual guide to runway markings for student pilots. This article focuses on how those markings are actually used during takeoff and landing.
Runway markings as flying cues, not just paint
Early in training, it’s easy to treat runway markings as background detail. But instructors and examiners expect you to actively reference them throughout every phase of flight close to the ground.

- FIVE STAR COMFORT: Embark for every journey sporting maximum comfort. Our over the ear headphones are constructed for a …
- FIVE BY FIVE COMMS: We understand reliable communication is key for safety. Our noise canceling headset with a microphon…
- EXCEPTIONAL QUALITY: Invest in your future. Aviation headsets for pilots are essential aviation tools that should be bui…
As an Amazon Associate, AviatorFinds earns from qualifying purchases.
Runway markings help you:
- Maintain correct alignment
- Judge whether your approach is stable
- Decide where to touch down
- Keep directional control after landing
Used properly, they reduce workload and improve situational awareness — especially during busy or unfamiliar operations.
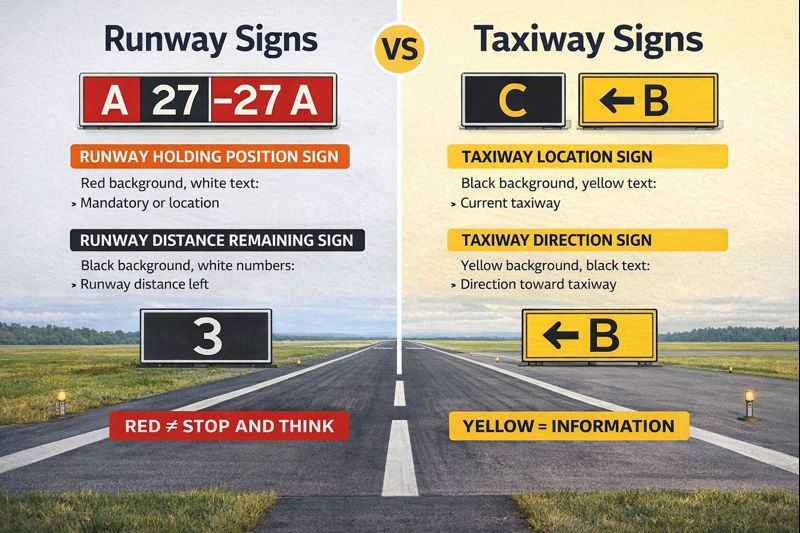
👉 For a complete overview of runway markings, runway signs, lighting, and takeoff and landing procedures, see our Runway Markings, Signs & Lighting: A Student Pilot Overview.
Using runway markings during lineup and takeoff
Before you even add power, runway markings are already working for you.
Centerline alignment
As you line up:
- Position the aircraft so the centerline runs straight between your legs
- Confirm the nose wheel and main wheels are aligned
- Avoid starting the takeoff roll with even a slight offset
A small misalignment at the start becomes much more noticeable once speed builds.
Runway numbers as a heading check
Runway numbers provide a final, visual confirmation of:
- runway orientation
- correct runway selection
- magnetic heading alignment
If the number doesn’t match what you expect, stop and verify before continuing.
Edge markings for lateral awareness
On wider runways especially, edge markings help prevent drifting:
- They give peripheral reference during acceleration
- They highlight subtle yaw or crosswind effects early
- They help you avoid “wandering” down the runway
Using runway markings on final approach
This is where markings become critical visual references.
The aiming point: your visual anchor
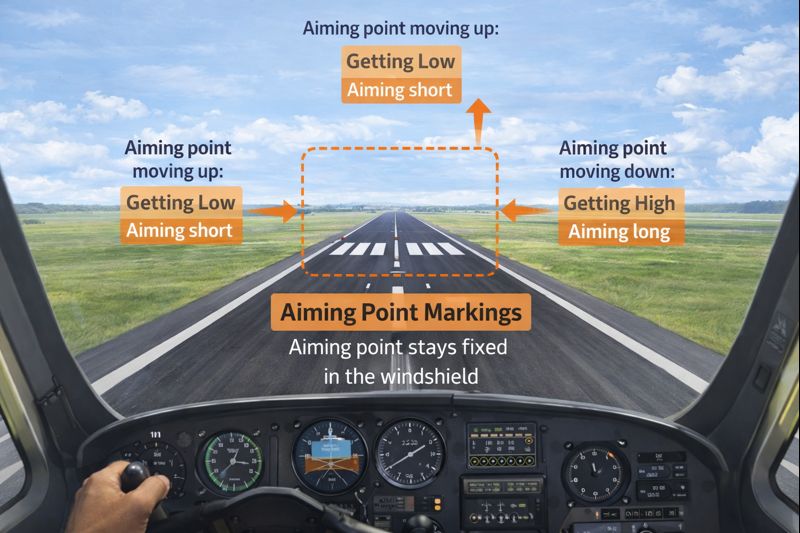
On final approach:
- The aiming point markings should appear stationary in the windshield
- If they move up → you’re getting low
- If they move down → you’re getting high
A stable aiming point picture is one of the clearest signs of a stabilised approach.
Threshold awareness
Understanding where the threshold begins — especially on runways with displaced thresholds — helps you:
- avoid landing short
- avoid aiming for unusable pavement
- adjust your visual picture on unfamiliar runways
You’re not trying to land on the threshold; you’re aiming to cross it safely and touch down beyond it.
👉 If you’re unsure how displaced thresholds differ from standard thresholds, we explain them in detail in our runway markings visual guide.
Touchdown zone markings and landing accuracy
Touchdown zone markings help you evaluate whether your landing is controlled and deliberate.
Why they matter
They show:
- where aircraft are expected to land
- whether you’re floating
- whether your approach speed was appropriate
Landing well beyond the touchdown zone is often a sign of:
- excess speed
- shallow flare
- late decision-making
For training flights and checkrides, consistent touchdown location matters more than smoothness alone.
Centerline and edge markings during rollout
Many student pilots stop “flying” once the wheels touch — but instructors don’t.
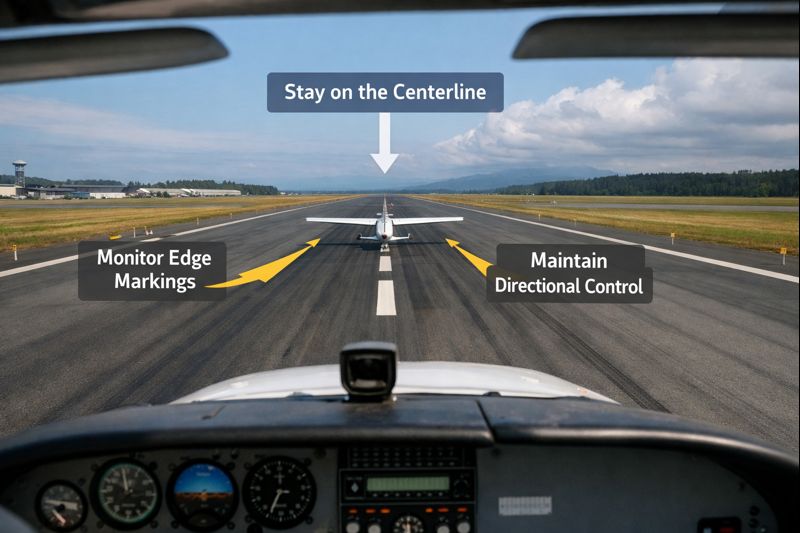
Maintaining centerline after landing
After touchdown:
- Keep your eyes far down the runway
- Use centerline markings to maintain directional control
- Apply rudder smoothly, not abruptly
This is especially important:
- in crosswinds
- on narrow runways
- during short-field or soft-field techniques
Avoiding runway edge drift
Edge markings help you detect slow drift during deceleration, when rudder authority decreases and braking increases.
Staying centered isn’t just neat — it’s a safety habit.
Common student pilot mistakes with runway markings
These mistakes are extremely common in early training:
- Aiming for the runway numbers instead of the aiming point
- Fixating on the far end of the runway during flare
- Ignoring the centerline once airborne
- Landing long because the runway “looks huge”
- Letting alignment drift after touchdown
Recognising these patterns early helps you correct them faster.
How instructors expect you to use runway markings
Instructors don’t just want you to know runway markings — they want to see you use them intentionally.
They’re watching for:
- deliberate alignment before takeoff
- stable visual picture on approach
- consistent touchdown point
- controlled rollout tracking the centerline
During exams or checkrides, your use of runway markings signals confidence, planning, and situational awareness.
Bringing it all together
Runway markings are one of the most reliable visual tools available to pilots — especially close to the ground, where precision matters most. When used properly, they guide alignment, improve landing accuracy, and reduce workload during critical phases of flight.
For a full breakdown of every runway marking you’ll encounter — including detailed diagrams and definitions — see our complete runway markings visual guide for student pilots.
👉 For a complete overview of runway markings, runway signs, lighting, and takeoff and landing procedures, see our Runway Markings, Signs & Lighting: A Student Pilot Overview.